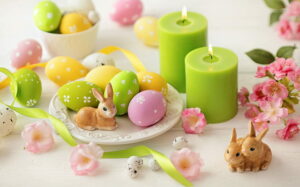
Easter is the cleanest, brightest, and kindest spring holiday when we visit each other, give gifts, and decorate our homes with Easter festive décor. Most of us associate this holiday with a fragrant, rich, Easter cake, bright, painted eggs, and Easter candles. Previously, only church candles were lit for this holiday, but today, Easter is decorated with a wide variety of decorative candles, in the form of Easter animals, eggs, baskets, etc. Easter candles can be purchased in stores or made by yourself with your own hands at home. Here are some tips on how to make eggshell candles of your own.

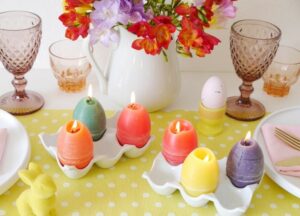
These colorful egg-shaped candles add a delightful touch to any decor. Molded in real eggshells and dyed with natural colors, these candles are amazingly easy to make. And the moment when you crack open the shell to get the finished candle out of it feels like magic! Even the Easter Bunny would be impressed.
Step 1: Remove the contents of the egg from the shell.
With medium grit sandpaper (120 grit sandpaper is used in this example), gently sand the two opposite ends of the egg. Sanding the ends makes them a little thinner, making it easier to make holes in the shell.
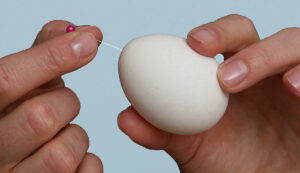
Gently holding the egg with one hand, place the tip of the knife on the sharp end of the egg and rotate the blade until it pierces the shell. Then turn the blade to enlarge the hole so that it is about the same diameter as the wick of your future candle.
Flip the egg over with the blunt end and repeat the process to make a second hole in the shell. On the blunt end of the egg, you will need a larger hole for the wax to fill in, so widen the hole about 0.4” with a knife. Don't worry if the hole doesn't come out nice and even. Then shake the egg over the container to remove the yolk and white, which you can use to make a delicious omelet. Wash the empty shell with hot soapy water and let it dry completely overnight.
Step 2: Insert the candle wick.
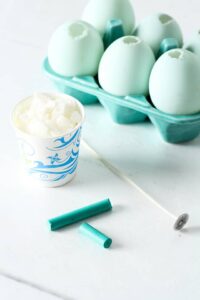
Cut a piece of candle wick so that it is about 5 to 7 centimeters longer than the egg. Candle wicks in spools can be easily purchased at an arts and crafts store. Insert the wick into the smaller hole at the pointed end of the egg, using the tip of a knife to help push the wick into the shell.
Keep pushing the wick inward until you can hook it in and pull it out of the larger hole on the opposite side of the egg. The wick should protrude from the shell by about 2” – 2.7” on both sides of the shell.
Step 3: Seal the small hole in the pointed end of the egg.
Since we will be pouring wax into the large hole at the blunt end of the egg, the smaller hole at the other end must be sealed so that the wax does not leak out. Seal the hole securely with masking tape. Lay several strips of tape on top of each other to securely cover the hole.
Attach a clothespin to the wick coming out of the wider hole to keep the wick from slipping back into the shell. The clothespin will also come in handy later when we fill the shell with melted wax.
Step 4: Prepare the wax.
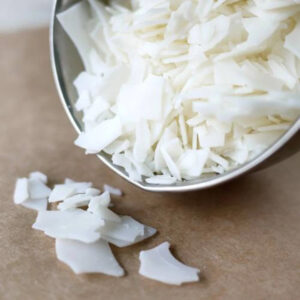
Paraffin wax will be perfect for this project, but it's just as easy, and sometimes cheaper, to use wax from regular candles you have at home. If you use candles, make sure they are white or natural. With a regular kitchen knife, scrape the wax off the sides of the candle until you get the right amount.
Step 5: Cut the colored wax crayons.
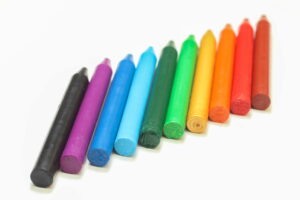
Wax crayons are an easy way to color wax. Choose the colors you want and cut about 0.9”- 1.1” from each crayon. Chop the cut chalk into small pieces.
Then place the wax and pieces of crayons into empty tins to melt. Fill the jars about three-quarters full with the wax and crayon mixture.
Step 6: Melt the wax.

Place the cans in a large pot of water. Make sure there isn't too much water so that the jars don't float but sit at the bottom of the pot. Heat the water to a boil, stirring the contents of each jar with a wooden stir stick, until the wax is completely melted and mixed with the wax crayon. Continue stirring until you have an evenly colored wax in each tin.
Step 7: Pour the wax into the shell.
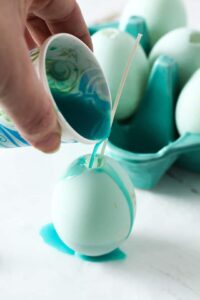
Place the prepared eggshell in an empty egg carton so that it stands upright. Pour the melted wax into the shell to the very top. To be sure that the wax has completely filled the shell, you can add it until some of the wax begins to flow out.
Use clothespins to securely hold the wicks in the center of the holes. As the wax hardens, it shrinks a bit and you will see a small indentation in the hole. You will need to add some melted wax to the top to fill this indentation. If at one time it is not possible to close the recess, repeat the procedure. Place the shell, completely filled with wax, in the refrigerator overnight.
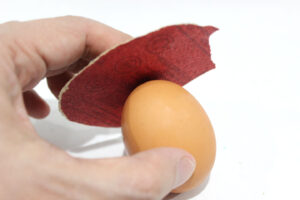
Step 8: Remove the shell.
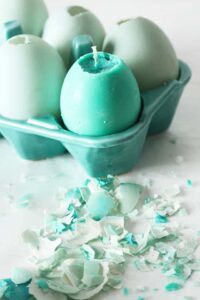
Crack open the shell to release the candle. The shell is very easily separated from the wax, as from a hard-boiled and timely chilled egg.
Trim the excess wick from the bottom of the candle with scissors.
If there are bits of egg film left on the wax, gently scrape it off with a metal ruler. You can then heat the surface of the candle with a hairdryer and finish polishing it with your fingertips.
Step 9: Align the bottom of the candle.
To help the Easter egg candle stand on the surface, sand the bottom end of the candle with sandpaper.
Step 10: Experiment with color layers.
To create candles with two or more layers of colors, partially fill the shell with one color, let it harden, and then add wax of a different color. This method is more time-consuming, but it gives amazing results!

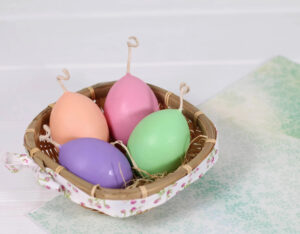
Ready! These candles are so adorable that you can put them on public display long before Easter, and leave them as a bright interior accent after the holiday!
These amazingly beautiful Easter candles can also be a great gift for your loved ones and friends, just add a beautiful basket decorated with imitation green grass or other suitable elements.
Warning!
Never leave a burning candle unattended and keep children and pets away from open flames! Candles should be placed on flat surfaces, away from flammable objects!